2013
Comet 4c - Plugin Development #3
21/10/13 22:00
Comet 4c - Performance Complete
31/07/13 19:00
Comet 4c - Plugin Development #2
22/06/13 12:00
Comet 4c - Continuous Refinement
07/04/13 11:11
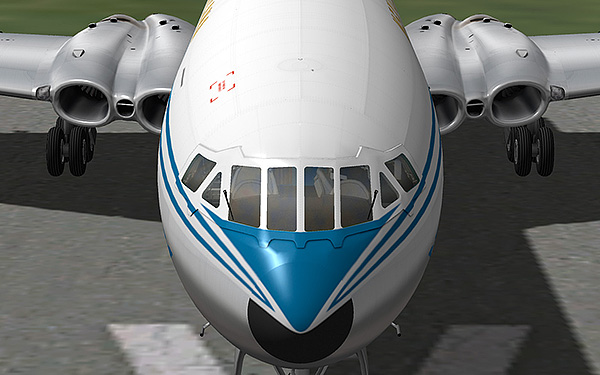
Fig. 1: Showing deliberate hard seams in the fuselage, following the lines of lap joints on the real Comet.
This shows progress on various cosmetic fronts. Considerable work has gone into refining the exterior model. Deliberate seams have been created on the fuselage to try to break up an otherwise perfect tube, and to represent the lap joints on the real Comet. I tried normal maps, but my view is still that the texture resolution is not high enough to show them subtly enough.
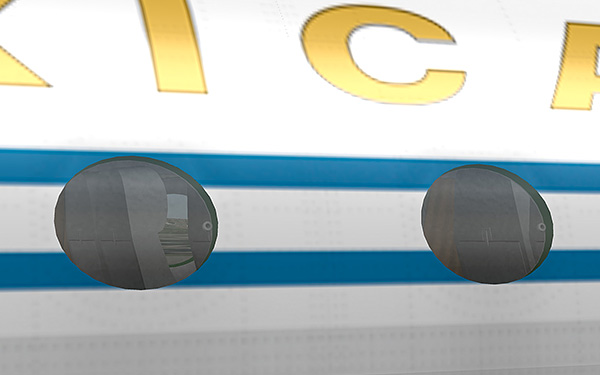
Fig. 2: Revised passenger windows and “glass” texture.
As part of the fuselage changes, the area around the windows — around all apertures — has been reworked to reduce the “stress” lines caused by too many edges converging on the same vertex. The result is smoother, with fewer false kinks. The glass has also been made “more glassy”, looking more apparently reflective during the day, but more transparent at night.
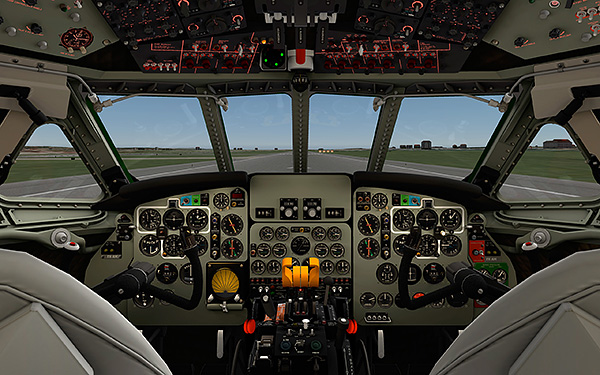
Fig. 3: Improved panel lighting
Changes continue in the cockpit, with greater smoothness around the triangular windows (DV windows) by giving them more texture area and baking shadows at very much higher resolution (8192x8192) than the final texture size (2048x2048). There is also a greater sense of daylight washing across the pilots panels from the side windows.
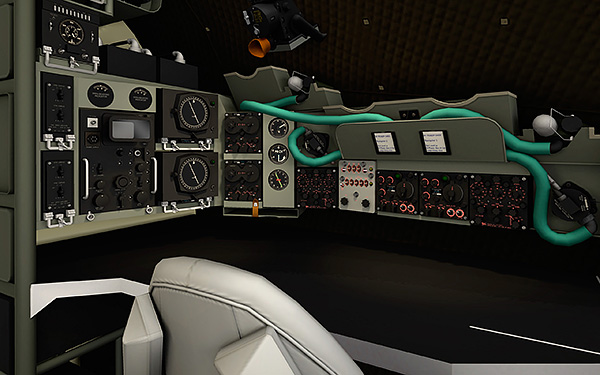
Fig. 4: Improved cockpit lighting
Lighting in the rest of the cockpit has been improved in the same way, baking at higher resolution to produce a smoother result. Blender 2.65 had new toys to play with as well, with more realistic ambience, where shadows had been pitch black before.
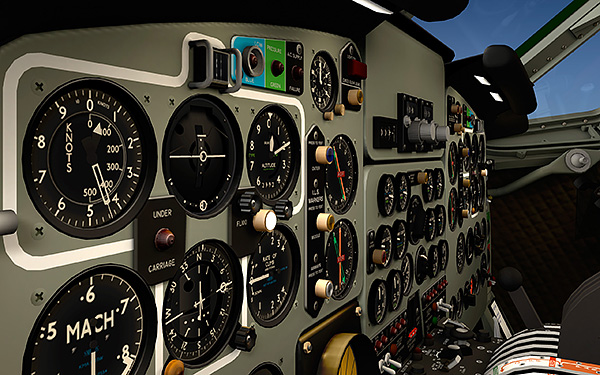
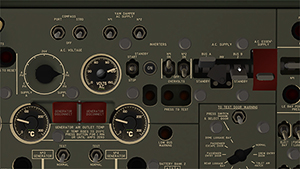
Fig. 5: Greater panel detail
The instrument panels can not have dirt effects or scratches in their current form, because I have rationed their texture space severely, in order to keep the VRAM usage as low as possible. Anyway, I like the model to look new and ex-works, rather than old and clapped out. However, even to my eye, it looked a bit too plain. Adding screw heads around each instrument was “cheap” in terms of VRAM, but has made a huge difference to realism.
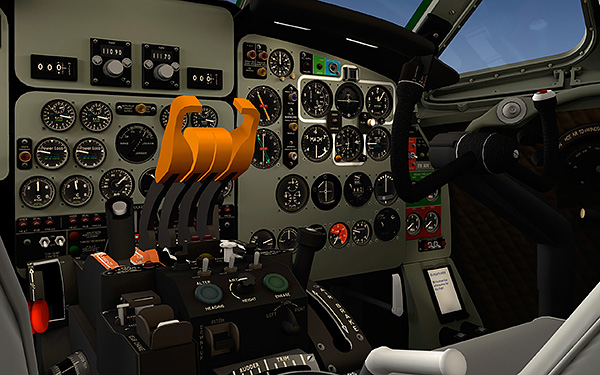
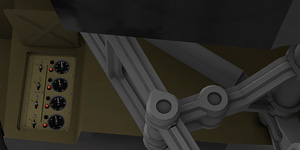
Fig. 6: Note the improved lighting effects from the glare-shield flood lamps and reading lamps.
Further improvements to lighting included re-jigging of the glare-shield flood lamps for each of the pilots panels, with less of a hot spot at the top of the panel, and more light washing further down the panel. Also, spot lamps have been modelled on the side window visor and on the side panels next to each pilot, and their light baked onto the textures. The effect is most obvious on the co-pilot’s flight card, below the brake pressure gauges on the right hand side.
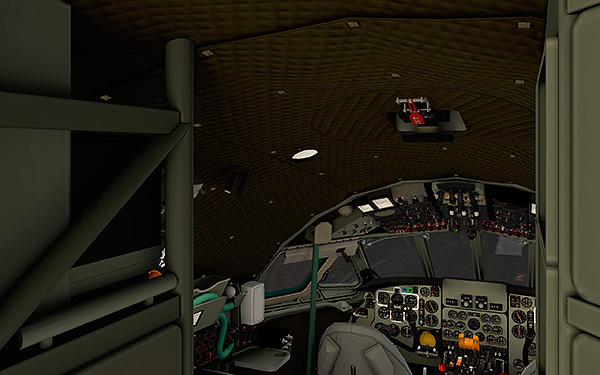
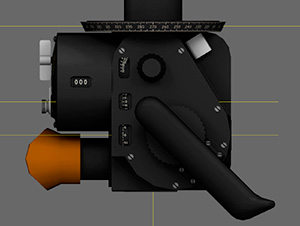
Fig. 7: Improvements to the cockpit quilted lining.
None of these improvements were absolutely vital, but adding the new periscopic sextant required me to re-organise the texture maps, which in turn required the whole cockpit to be re-baked, and so I took the opportunity to make other improvements at the same time. The quilted lining around the cockpit has been completely re-made, making it appear to sag a little more between the pop-fasteners, plus a lamp, and the escape hatch and periscope mount.
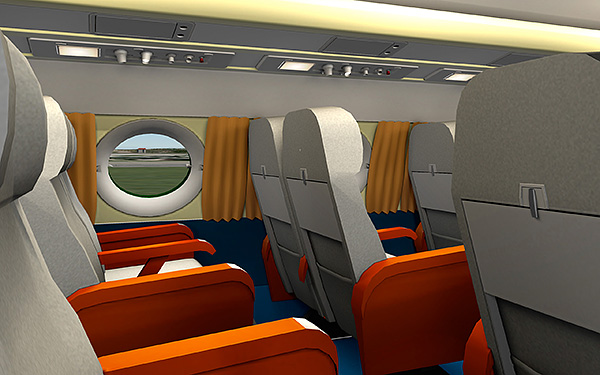
Fig. 8: More detail in the passenger cabin. The rather surprising colours are for Mexicana, thanks to Bob Hood, who sent photographs from the restoration of the real XA-NAR at the Museum of Flight in Seattle. He said they really are bright, vivid, almost garish.
I’ve added more detail to the passenger cabin: a newly-discovered photograph of the interior of a real Comet made me realise that the curtains across each window should be in two parts. There are also curtains across each partition (very simply drawn, and hanging straight to minimise polygons, as seen in the RAF VIP version).
The whole passenger compartment fights to justify expenditure in polygons. It’s the sort of thing that is only looked at occasionally, therefore everything must be modelled as crudely as I can get away with. However, I decided that the seat backs were too plain, and modelled tables and magazine pockets.
Apart from a tweaks to lighting intensity (or any necessary bug-fixes — I have spotted a few ragged edges even while collecting screen shots for this post) this really is the last of the cosmetic work on the Comet. All effort now is going into writing a plugin to enable more of the cockpit to function properly. More on that soon …
--
GMM-P (07/04/2013)

Comet 4c - Periscopic Sextant Animation
12/03/13 18:00